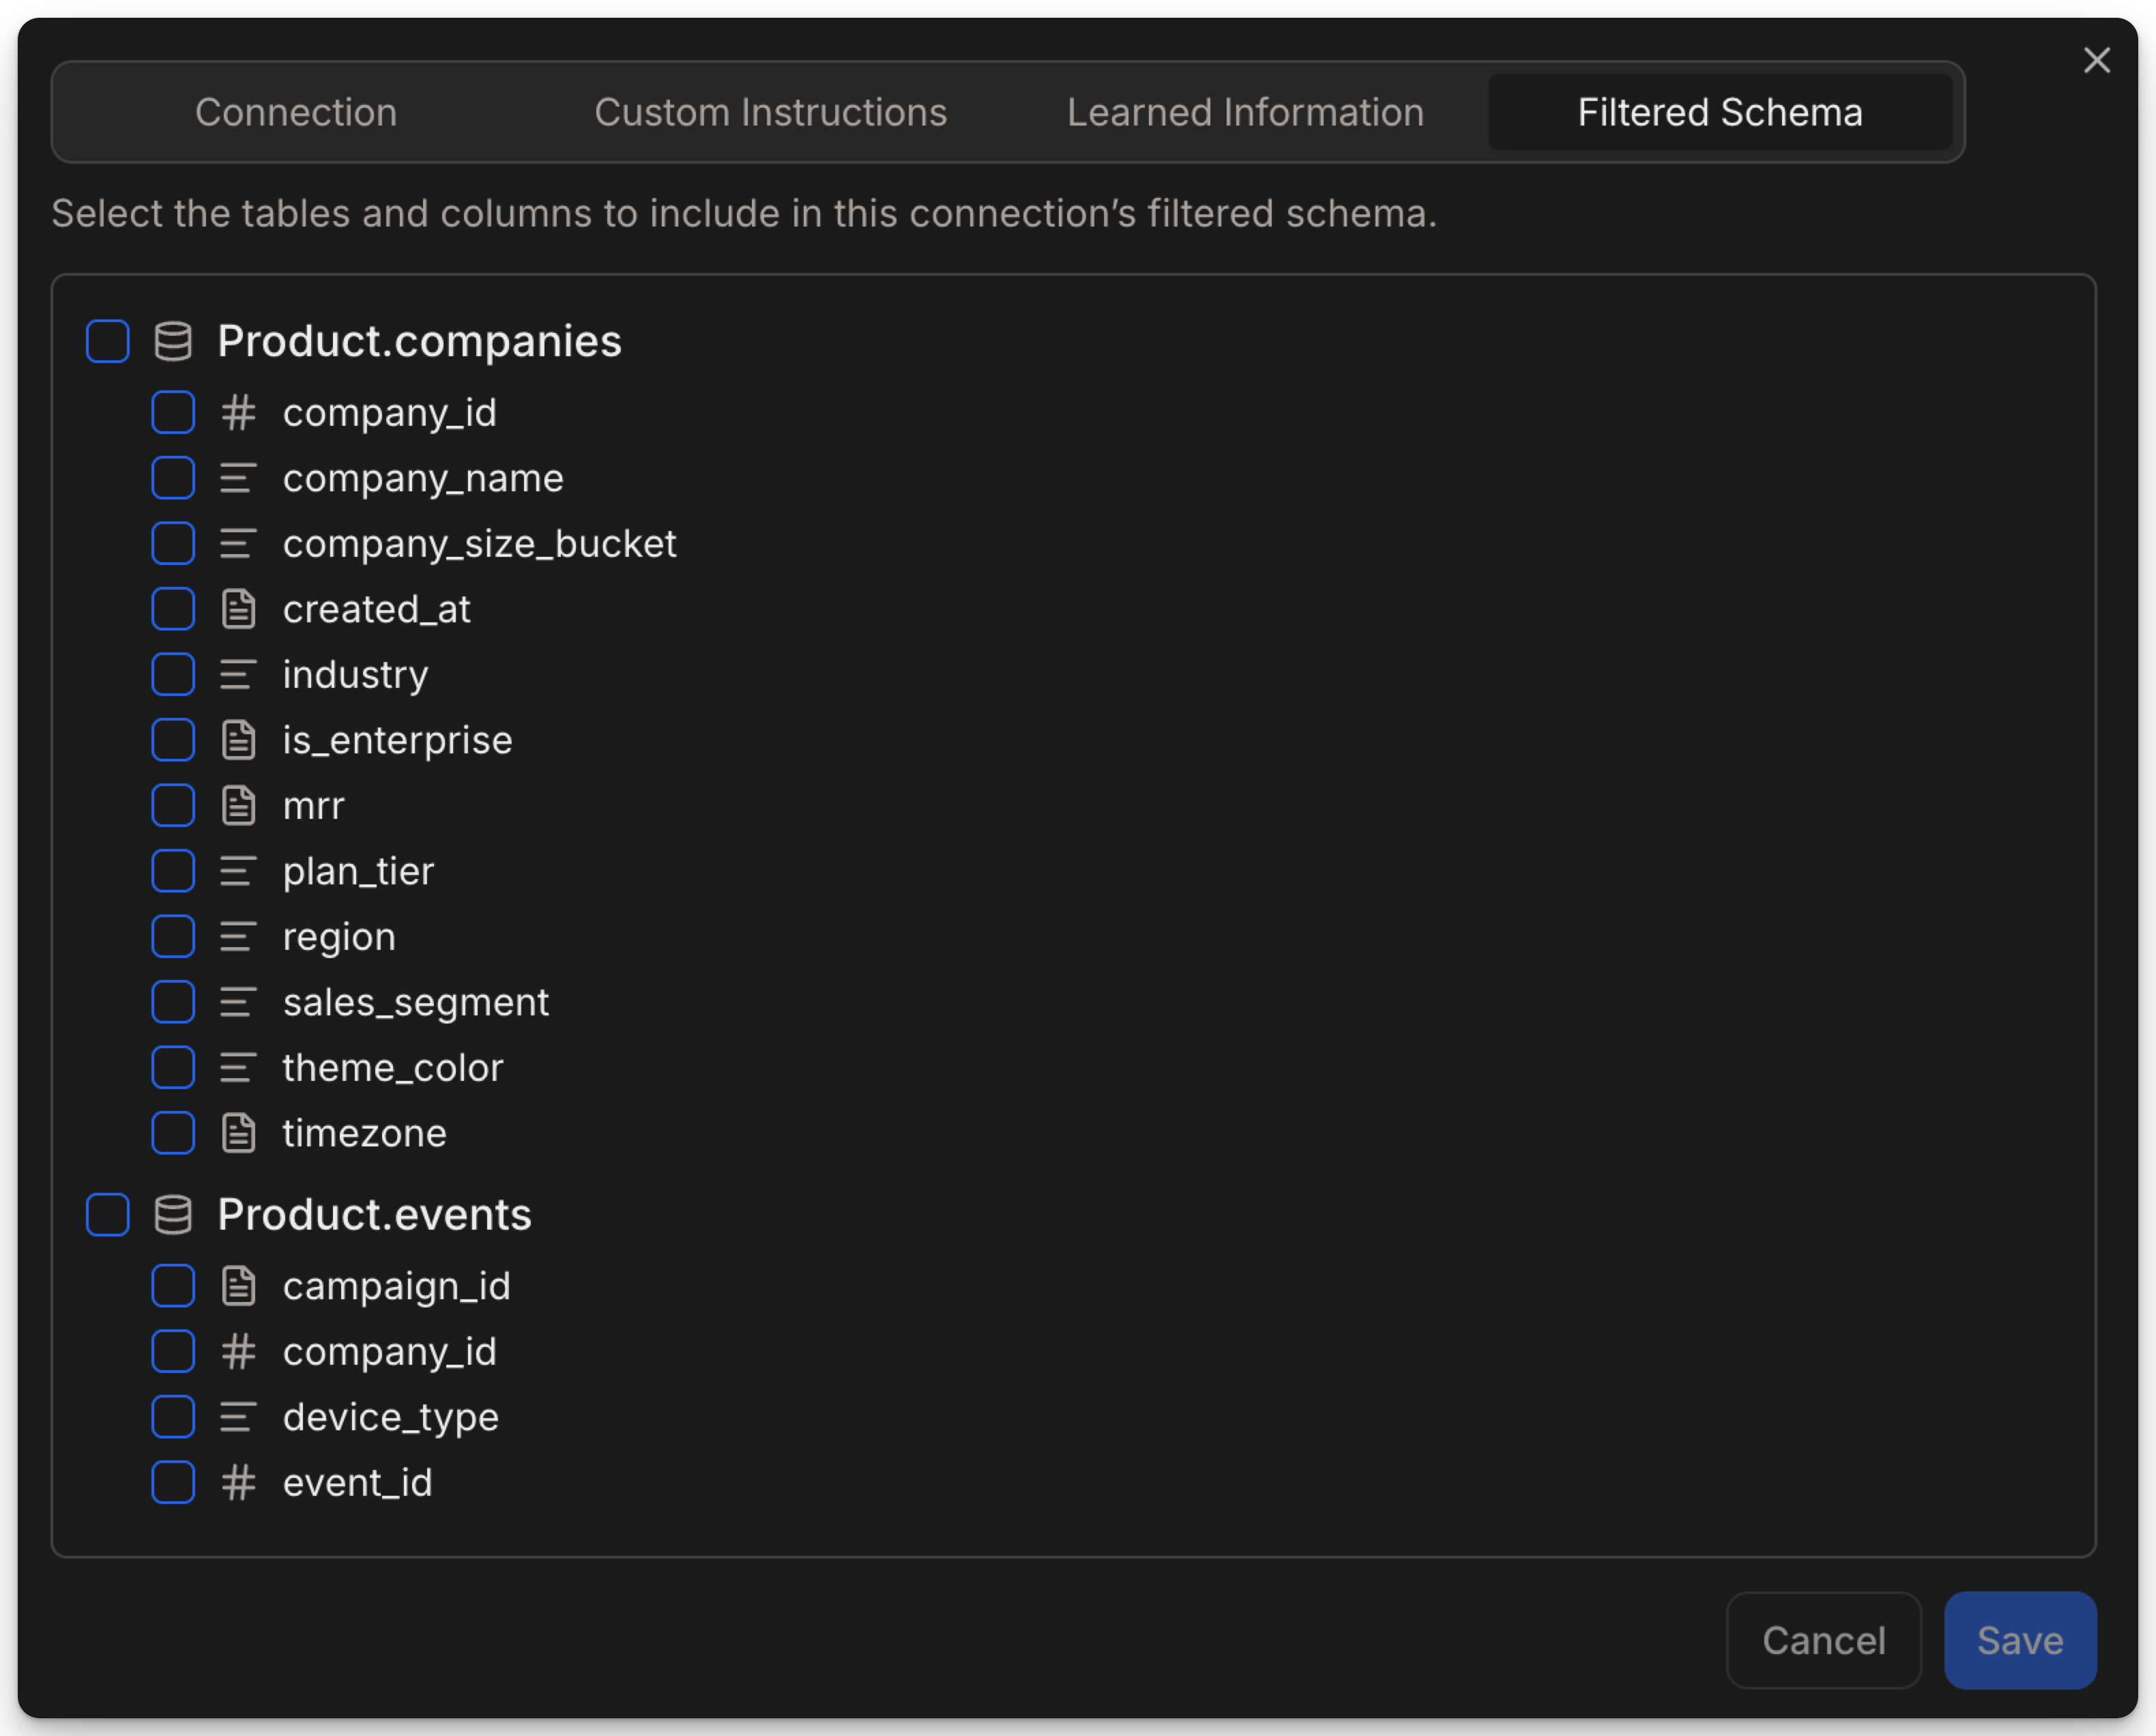
Filtered schemas let you control which parts of a database or warehouse are exposed to Julius. Instead of syncing every table and column from a connection, you can choose a smaller, safer subset that the AI will use in chats, dashboards, and notebooks. This is especially helpful when:
  • You have sensitive tables that should never be queried by AI.
  • Your database has many legacy or noisy tables that would clutter results.
  • You want users using this connector to start with a curated analytics schema instead of the full production database.

How to Set Up a Filtered Schema

Follow these steps to control which tables and columns Julius uses from your data source:
1

Connect Your Data Source

First, set up your database or warehouse connection as you normally would. See the specific setup guide for your source (e.g., Postgres, MySQL, etc.) if you need help.
2

Go to the Filtered Schema Tab

In the connection settings, navigate to the Filtered Schema tab. This is available for each database or warehouse connector you’ve set up.
3

Select Tables and Columns to Expose

You’ll see a list of tables and columns in your database. Use the checkboxes to select which ones Julius can access.

Notes:
  • By default (with nothing selected), ALL tables and columns in the schema are accessible.
  • If you check a table, only checked tables (and any checked columns in them) will be exposed to Julius.
  • You can get as granular as you like: hide whole tables or only specific columns (e.g., sensitive fields) without affecting others.
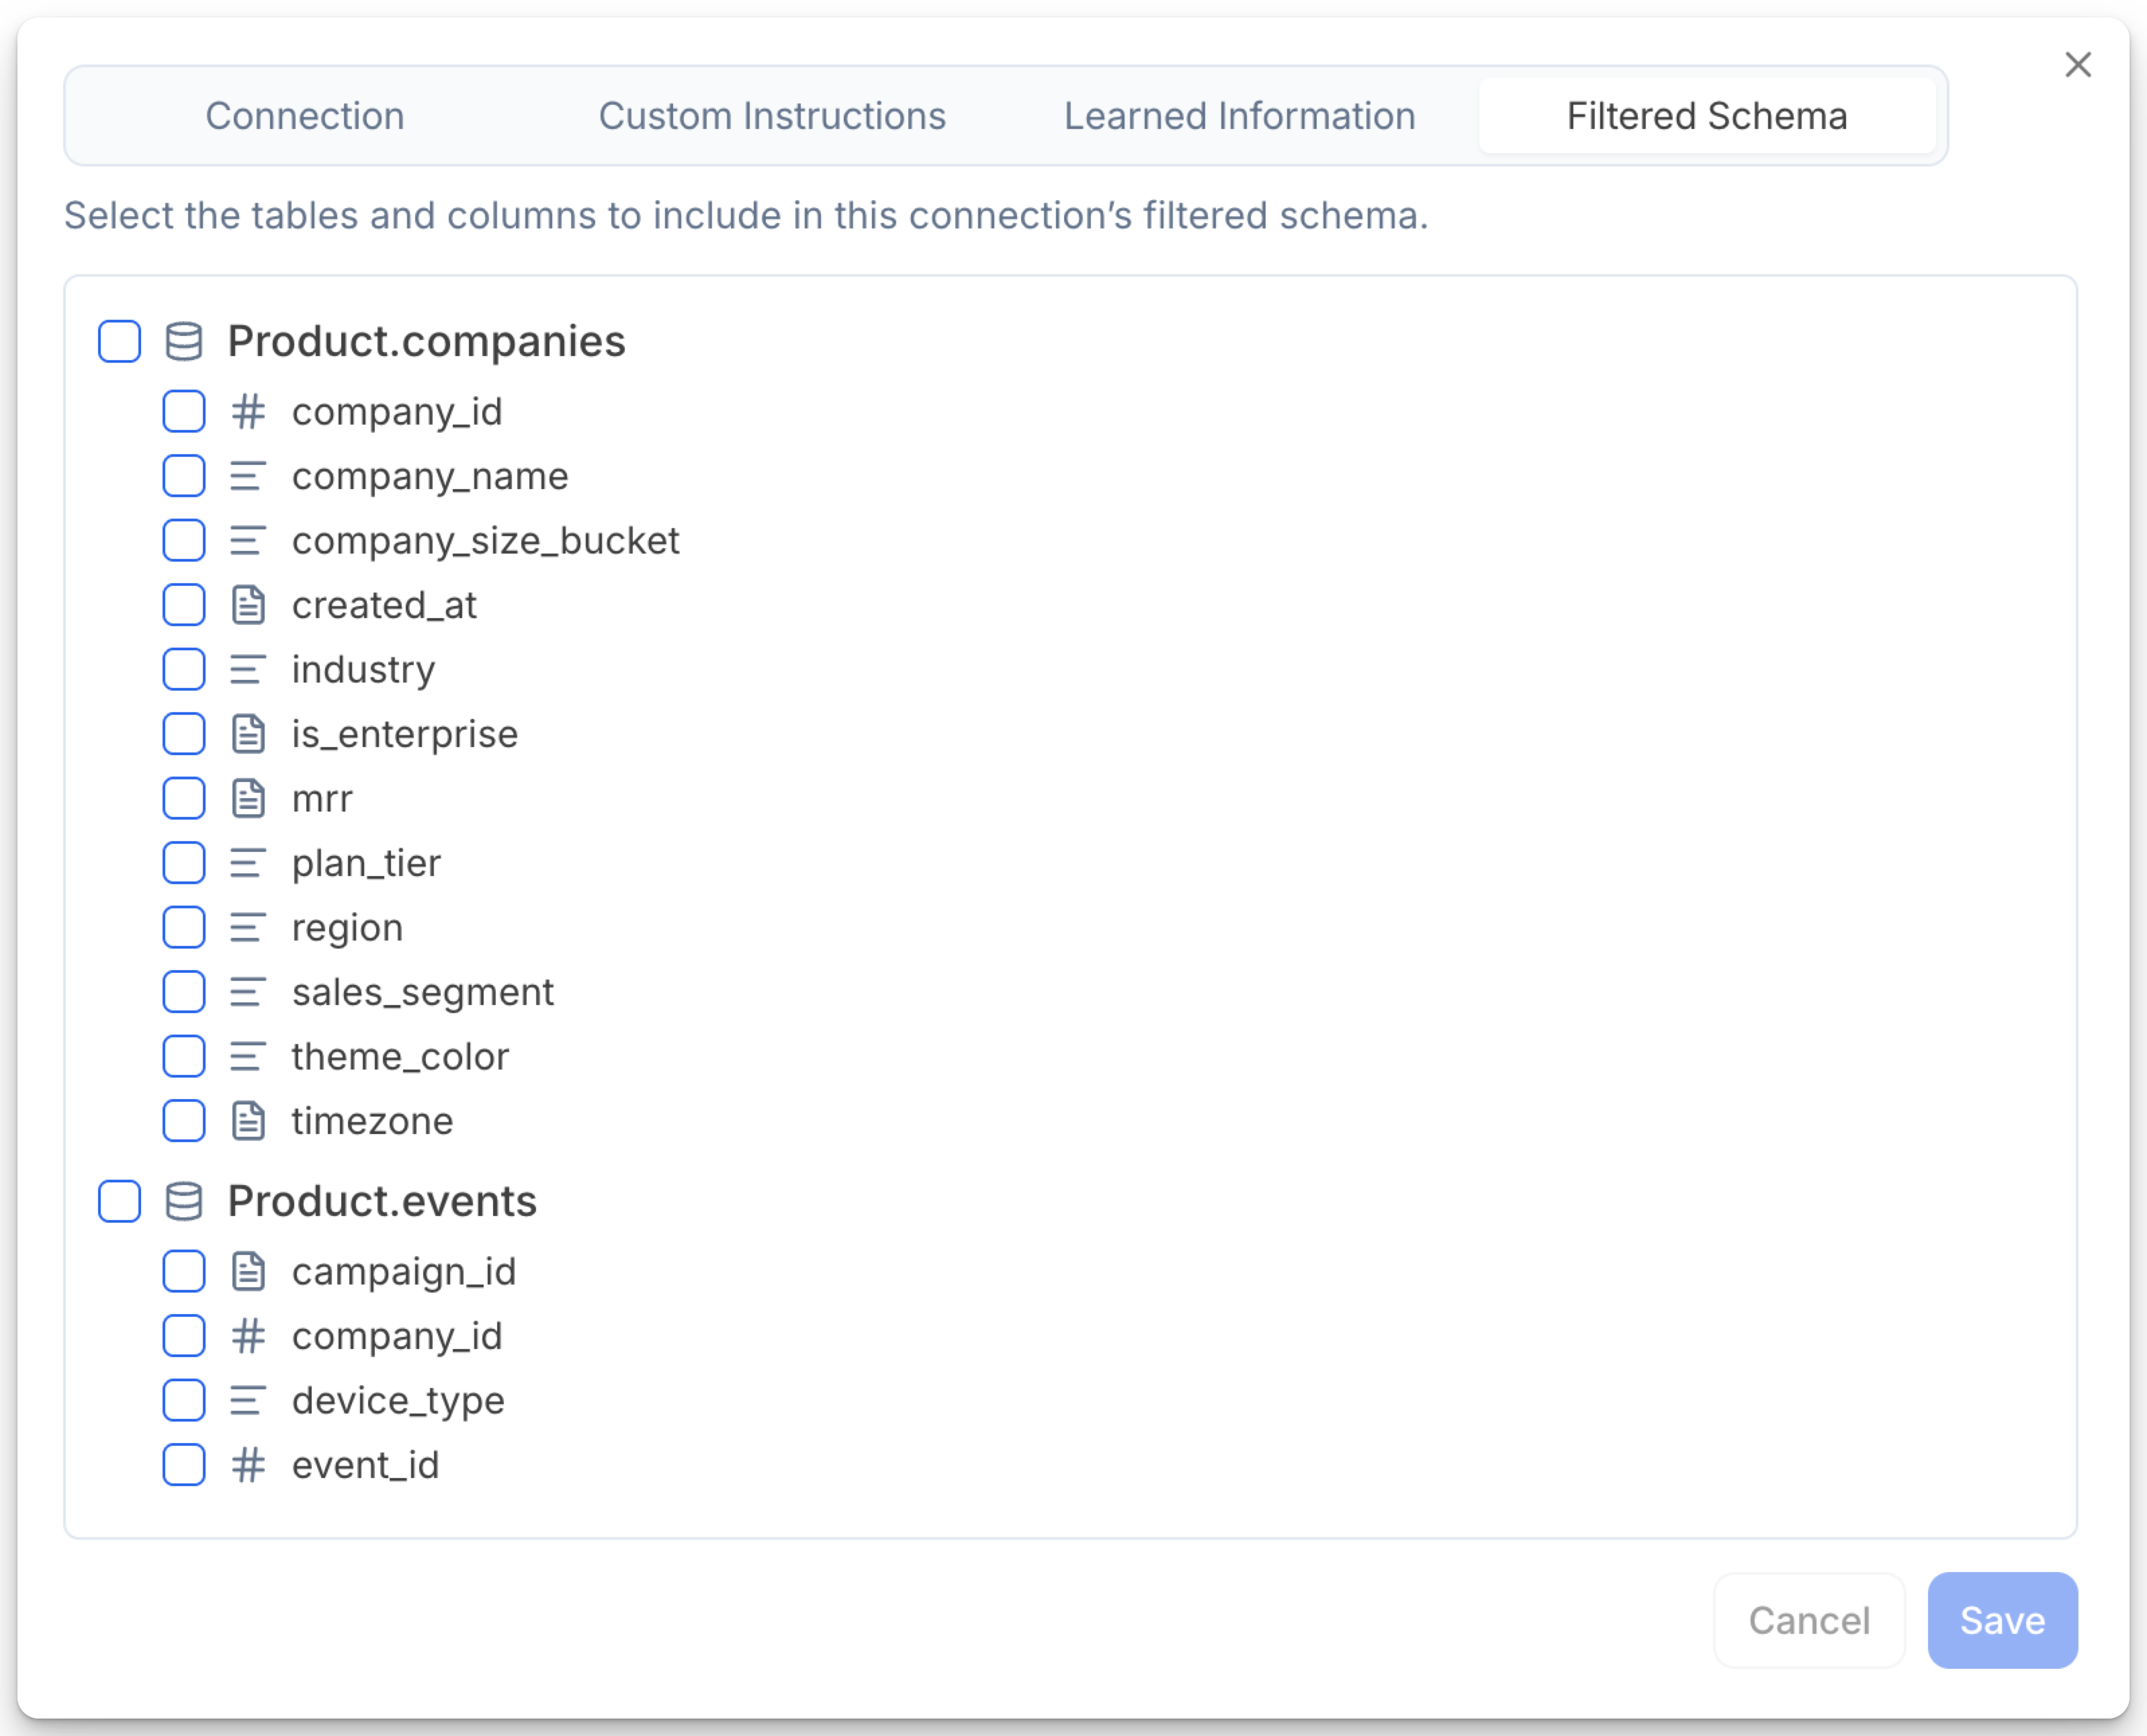
Filtered schema configuration in Julius
Important:
Filtered Schemas apply to all users who access this connector, not just you. If you configure a filtered schema and share the data connector with your team, everyone using that connector will be limited to the tables and columns you select.
This is especially helpful for:
  • Ensuring no one (even by accident) can query sensitive tables
  • Giving your teammates a simplified, curated view of the data
  • Maintaining consistent data access policies across your organization
To set different access levels for different users, create separate connectors for each permission set, each with its own filtered schema.